Owning a Honda EU3000iS generator is like having a reliable friend who’s always ready to provide power when you need it most. But just like any good friendship, it thrives on care and attention. Mastering Honda EU3000iS Maintenance & Long-Term Care isn't just about preventing breakdowns; it's about ensuring your investment delivers peak performance, every single time, for years to come. From emergency power during an outage to powering your outdoor adventures, knowing how to properly maintain your EU3000iS will keep it humming efficiently and safely.
At a Glance: Your EU3000iS Care Checklist
- Safety First: Always operate outdoors in well-ventilated areas, away from windows and doors, to prevent carbon monoxide poisoning.
- Regular Oil Changes: Essential after the first 20 hours, then every 6 months. Use high-quality 10W-30 oil.
- Clean Air Filter: Check and clean every 50 hours or 6 months (more often in dusty conditions).
- Spark Plug TLC: Inspect and clean annually to ensure reliable starting.
- Fuel Management: Use fresh, unleaded gasoline with no more than 10% ethanol. Drain fuel for long-term storage.
- Proper Storage: Keep it dry and protected; drain fuel for storage over 30 days.
- Overload Protection: Understand your wattage limits and reset the system if the red light appears.
Why Your EU3000iS Deserves the Best Care
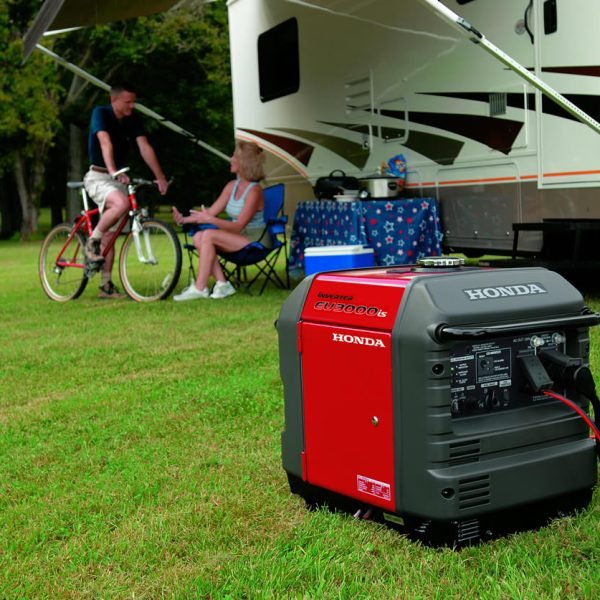
The Honda EU3000iS isn't just another generator; it's a marvel of portable power. With its inverter technology, you get stable, clean electricity perfect for sensitive electronics. The Eco-Throttle system intelligently adjusts engine speed to match the load, saving fuel and reducing noise—a true game-changer. Features like the Oil Alert System, which automatically shuts down the engine when oil levels are too low, and built-in overload protection, all point to a design focused on longevity and user-friendliness. This sophisticated engineering means a little proactive care goes a long way in preserving its capabilities. To truly appreciate its robust design and capabilities, you might want to Explore Honda EU3000 Generators in more detail.
But even the best engineering needs a human touch. Regular maintenance isn't a chore; it's a commitment to uninterrupted power and safety.
Safety First: Non-Negotiables Before You Start
Before you even think about firing up your Honda EU3000iS, let’s talk safety. These aren't just recommendations; they are critical safeguards to protect you and those around you.
The Invisible Killer: Carbon Monoxide (CO) Poisoning
Generator exhaust contains carbon monoxide, a colorless, odorless, and deadly gas. This is the single most important safety consideration.
- Outdoors Only: Never, ever operate your EU3000iS indoors—not in a garage, basement, crawl space, or even a partly enclosed area. This is non-negotiable.
- Ventilation is Key: Always run the generator outside, in a well-ventilated space, far away from any open windows, doors, vents, or hatches that could allow exhaust fumes to enter your home or vehicle. Think at least 20 feet away from any structure.
Hot Zones: Exhaust and Generator Surfaces
During and after operation, your generator's exhaust system and parts of the generator itself become incredibly hot.
- Keep Your Distance: Maintain at least one meter (about three feet) of clearance between the generator and any buildings, vehicles, or flammable materials. Restricting airflow can cause overheating and fire.
- Hands Off: Avoid touching the generator, especially the engine and muffler areas, during or immediately after use. Always let it cool down completely before moving or performing maintenance.
Electrical Hazards: Water and Overload
Working with electricity always demands respect. Your EU3000iS is designed with safeguards, but you have a role to play.
- Stay Dry: Never use the generator in wet conditions. Keep it dry, out of rain or snow, and away from pools or sprinkler systems. Do not touch it with wet hands. Water and electricity are a dangerous combination.
- Grounding: Always use proper grounding techniques as outlined in your manual. This helps protect against electrical shock.
- Know Your Limits: The EU3000iS provides 2,800 running watts and 3,000 peak watts. Calculate the total wattage of all appliances you plan to connect to ensure you don't exceed its capacity. Overloading can damage the generator and connected devices.
- Overload Indicator: If the red overload indicator light comes on, it means you've exceeded the generator's capacity. Unplug some appliances, reduce the load, and then reset the system.
Fueling Safely: A Flammable Situation
Gasoline is highly flammable. Handle it with extreme care to prevent fires or explosions.
- Cool Down First: Always shut off the generator and allow the engine to cool for 5-10 minutes before refueling. Fuel vapors can ignite on hot surfaces.
- Open Air: Refuel only in a well-ventilated outdoor area, away from sparks, open flames, electrical equipment, and flammable materials. Absolutely no smoking around the refueling area.
- No Spills: Use a funnel and fill slowly, never exceeding the red line inside the tank. If you spill fuel on the engine, do NOT start the generator until it has completely evaporated and the area is dry.
General Operational Safety
- No Mixing: Do not connect your Honda EU3000iS with a different generator model. Parallel operation is only for two identical EU3000iS units using a specific cable kit.
- Stationary Operation: Never operate the generator while it's on a moving vehicle, such as a truck, boat, or trailer. It must always be on a level, stationary surface.
Getting Started: Mastering Daily Operation
Knowing how to properly start and stop your EU3000iS is the foundation of good long-term care. It ensures smooth operation and prevents unnecessary wear.
Before You Start: Your Pre-Flight Checklist
Every time you prepare to use your generator, a quick visual inspection and fluid check are essential.
- Fuel Check: Ensure there's sufficient, fresh gasoline in the fuel tank. Remember, gasoline degrades over time.
- Oil Check: Unscrew the oil fill cap (usually yellow) and check the oil level. If it's low, add high-quality 10W-30 oil until it reaches the upper level mark without overfilling.
- Positioning: Place the generator on a firm, level surface, clearing any debris or flammable materials from around it. Double-check that it's outdoors and in a well-ventilated area, adhering to all safety guidelines.
Starting the Engine: A Step-by-Step Guide
Your EU3000iS offers both electric start (convenient!) and recoil start as a backup.
- Fuel Valve ON: Locate the fuel valve lever and turn it to the "ON" position. This allows fuel to flow to the carburetor.
- Choke Adjustment:
- Cold Engine: Pull the choke knob out to the "CLOSED" position. This restricts airflow, creating a richer fuel mixture needed for cold starts.
- Warm Engine: Leave the choke knob in the "OPEN" position.
- Engine Switch ON: Turn the engine switch to the "ON" position.
- Initiate Start:
- Electric Start: Press and hold the starter button. Do not hold it for more than 5 seconds at a time to prevent overheating the starter motor. Release it once the engine starts, allowing it to return to the "ON" position. If it doesn’t start within 5 seconds, wait 10 seconds before trying again.
- Recoil Start: If using the recoil starter, grasp the handle firmly and pull the cord briskly after you feel initial resistance. Avoid letting the cord snap back; gently guide it to prevent damage.
- Choke Open (if used): Once the engine starts and runs smoothly (you'll hear it), gradually push the choke knob back to the "OPEN" position. Do this slowly to avoid stalling the engine.
Engaging Eco-Throttle: Smart Power for Smart Use
The Eco-Throttle system is one of the EU3000iS's best features for fuel efficiency and noise reduction.
- Warm-Up: Allow the generator to run for a couple of minutes to warm up.
- Eco-Throttle ON: For light loads or standby operation, flip the Eco-Throttle switch to the "ON" position. The engine speed will drop, conserving fuel and reducing noise levels.
- Heavy Loads: If you're powering appliances that demand a lot of starting or continuous power, keep the Eco-Throttle switch "OFF" to ensure full power is readily available.
Connecting Devices
With the engine running smoothly and warmed up, you can now plug your devices into the AC outlets. Always ensure your devices are within the generator's wattage capacity.
Stopping the Generator: The Proper Shutdown
A correct shutdown procedure is just as important as a correct start for long-term health.
- Disconnect Devices: First, unplug all devices and disconnect any extension cords from the generator's outlets.
- Engine Switch OFF: Turn the engine switch to the "OFF" position. This cuts off ignition.
- Fuel Valve OFF: Crucially, turn the fuel valve lever to the "OFF" position. This prevents fuel from flowing into the carburetor, reducing the risk of fuel leaks, evaporation, and stale fuel issues in the carburetor bowl during storage.
- Cool Down: Allow the generator to cool down completely, especially after prolonged operation, before moving or storing it.
The Heart of the Matter: Your Essential Maintenance Schedule
Regular maintenance is the cornerstone of your Honda EU3000iS's longevity and reliable performance. Think of it as preventative medicine for your machine. Sticking to the schedule below, adapted from the manual, will save you headaches and expense down the road.
Oil Changes: The Lifeblood of Your Engine
Engine oil lubricates moving parts, reduces friction, and helps cool the engine. Dirty or old oil loses its protective properties, leading to increased wear and tear.
- First 20 Hours: This is the most critical oil change. It removes manufacturing residue and initial wear particles. Do NOT skip this.
- Every 6 Months: After the initial break-in, aim for an oil change every 6 months or more frequently if you use the generator heavily (e.g., hundreds of hours in a short period).
- Oil Type: Always use high-quality 10W-30 motor oil. This viscosity is suitable for a wide range of operating temperatures.
How to Change the Oil:
- Warm It Up: Run the generator for a few minutes to warm the oil slightly. Warm oil drains more completely. Then shut it off and let it cool for a moment.
- Position: Place the generator on a level surface. Position an oil drain pan beneath the drain plug.
- Drain Plug: Remove the oil fill cap/dipstick. Then, locate and carefully remove the oil drain plug. Allow all the old oil to drain out completely.
- Replace Plug: Reinstall the drain plug securely. Do not overtighten.
- Refill: Slowly add fresh 10W-30 oil through the oil fill opening. Check the oil level frequently using the dipstick (do not screw it in, just insert it to the threads for checking) until it reaches the upper limit mark.
- Secure: Replace and tighten the oil fill cap/dipstick.
Breathing Easy: Air Filter Care
A clean air filter is vital for engine performance. It prevents dust and debris from entering the engine, where it can cause significant damage. A dirty filter restricts airflow, leading to reduced power, increased fuel consumption, and potential engine damage.
- Every 50 Hours or 6 Months: This is your standard interval.
- More Frequently in Dusty Conditions: If you operate your generator in dry, dusty environments (like a construction site or during a wildfire season), check and clean the filter much more often—potentially every few days of heavy use.
How to Clean the Air Filter:
- Access: Locate and open the air filter housing. This usually involves unlatching clips or unscrewing a few fasteners.
- Remove: Carefully remove the foam filter element.
- Clean: Wash the foam filter in warm, soapy water. Gently squeeze out the water and allow it to air dry completely. Alternatively, you can tap it gently to dislodge loose dirt (do NOT use compressed air, as it can damage the filter).
- Oil (if applicable): Some foam filters require a light coating of engine oil after cleaning and drying. Check your manual for specific instructions on oiling the filter. If oiling, lightly coat the filter with clean engine oil, then squeeze out any excess. The filter should be slightly damp, not dripping.
- Reinstall: Place the clean, dry (and oiled, if necessary) filter back into the housing and secure the cover.
The Spark of Life: Maintaining Your Spark Plug
The spark plug ignites the fuel-air mixture, making your engine run. A fouled or damaged spark plug can lead to hard starting, misfires, and reduced engine efficiency.
- Annually: Check and clean the spark plug once a year, or after every 100-200 hours of operation, depending on usage.
- Engine Cool: Always ensure the engine is completely cool before attempting to remove or inspect the spark plug.
How to Check and Clean the Spark Plug:
- Access: Disconnect the spark plug cap/wire. Use a spark plug wrench (often provided with the generator) to carefully remove the spark plug.
- Inspect: Examine the spark plug's electrode and insulator tip. Look for:
- Fouling: Black, sooty deposits indicate a rich fuel mixture or oil burning.
- Carbon Buildup: Dark brown or black carbon deposits.
- Erosion: Worn electrodes.
- Cracks: In the ceramic insulator.
- Clean: If the plug is merely fouled with carbon, you can carefully clean it with a wire brush or a spark plug cleaner.
- Gap Check: Use a wire-type feeler gauge to check the spark plug gap. Adjust it to the specification listed in your manual by carefully bending the ground electrode.
- Replace if Needed: If the plug is heavily fouled, eroded, or cracked, replace it with a new one of the correct type (refer to your manual for the specific part number).
- Reinstall: Carefully thread the spark plug back into the cylinder head by hand to prevent cross-threading. Once finger-tight, use the wrench to tighten it to the specified torque (usually about 1/2 to 3/4 turn past finger-tight for a used plug, or 1/2 turn for a new plug). Do not overtighten.
- Reconnect: Reconnect the spark plug cap securely.
Fueling Your Powerhouse: Best Practices for Gasoline
The quality and freshness of your fuel directly impact your generator's performance and longevity. Gasoline can be surprisingly fickle.
The Right Fuel Makes All the Difference
- Fresh, Unleaded: Always use fresh, clean, unleaded gasoline with an octane rating of 86 or higher.
- Ethanol Content: This is crucial. Use gasoline with no more than 10% ethanol (E10). Gasoline with higher ethanol content (like E15, E85) can damage engine components, especially rubber and plastic seals, and can lead to water absorption and corrosion.
- Fuel Stabilizer: For any fuel that will sit for more than a few weeks, consider adding a high-quality fuel stabilizer. This prevents fuel degradation and gum buildup in the carburetor.
Refueling with Care
Remember the safety points about refueling. Always:
- Cool Down: Shut off the generator and let it cool for 5-10 minutes.
- Ventilated Area: Move to a well-ventilated outdoor space, away from ignition sources.
- Fuel Valve OFF: Turn the fuel valve to the "OFF" position before opening the fuel cap.
- Slow & Steady: Open the fuel cap slowly to release pressure. Use a funnel and fill slowly, never exceeding the red line inside the tank. Avoid spillage.
- Secure: Tighten the fuel cap securely.
- Wait: Wait 1-2 minutes before turning the fuel valve back to "ON" and restarting the generator.
Dealing with Old Fuel
If your generator hasn't been used for a while (e.g., a few months) or if you're unsure about the fuel's age, it's best to drain the old fuel and replace it with fresh gasoline. Stale fuel can cause starting issues and clog the carburetor.
Rest and Recharge: Long-Term Storage Solutions
Proper storage prevents issues like fuel degradation, corrosion, and pests. How you store your EU3000iS depends on how long it will be out of commission.
Short-Term Storage (A Few Days)
For periods of a few days to a week:
- Fuel Valve OFF: Ensure the fuel valve is in the "OFF" position. This prevents fuel evaporation and potential leaks.
- Keep it Dry: Store the generator in a dry, protected area, away from direct sunlight or extreme temperatures.
- Secure: Keep it in a secure location where it won't be easily damaged or stolen.
Long-Term Storage (Over 30 Days)
This is where fuel management becomes critical. Gasoline degrades over time, forming gummy deposits that can clog the fuel system.
- Fuel Stabilizer (Optional but Recommended): If you plan to store it with fuel, add a quality fuel stabilizer to the tank, then run the engine for 10-15 minutes to ensure the stabilized fuel circulates through the carburetor.
- Drain the Fuel (Recommended): The most reliable method for long-term storage is to completely drain the fuel tank and carburetor.
- Tank: Syphon or drain all fuel from the fuel tank into an approved gasoline container.
- Carburetor: Turn the fuel valve to the "OFF" position. Then, loosen the carburetor drain screw (refer to your manual for its exact location) and allow all remaining fuel to drain into a suitable container. Once drained, retighten the screw. Running the engine until it runs out of fuel after draining the tank will ensure the carburetor is truly empty.
- Oil Change: Perform an oil change before storing. Fresh oil protects internal components during downtime.
- Spark Plug Protection: Remove the spark plug and pour about a teaspoon of clean engine oil into the cylinder. Gently pull the recoil starter a few times (without installing the spark plug) to distribute the oil. This helps prevent corrosion in the cylinder. Reinstall the spark plug.
- Clean Exterior: Clean the generator's exterior, removing any dirt or debris.
- Cover: Cover the generator with a breathable cover to protect it from dust and moisture.
- Location: Store in a clean, dry, well-ventilated area, away from furnaces, water heaters, or any appliance that uses a pilot light or creates sparks.
Troubleshooting & Smart Habits for Longevity
Even with the best maintenance, sometimes things don't go as planned. Knowing common issues and maintaining good habits can extend your generator's life.
The Overload Indicator
If the red overload indicator illuminates, it's a clear signal that you're drawing too much power.
- Action: Immediately unplug some devices to reduce the load.
- Reset: The system should reset itself once the load is within capacity. If not, turn the generator off, wait a moment, and restart it.
- Prevention: Always calculate your wattage needs before connecting appliances. The EU3000iS offers 2,800 running watts and 3,000 peak watts—respect these limits.
Oil Alert System
Your generator is equipped with an Oil Alert system that automatically shuts down the engine if the oil level drops too low. This is a protective feature, not a malfunction.
- Action: If the engine shuts down unexpectedly, check the oil level first. It's likely low.
- Prevention: Regular oil checks before each use, and adhering to the oil change schedule, will prevent this system from engaging unnecessarily.
General Tips for a Long-Lasting Generator
- Level Surface: Always operate your generator on a level surface. Operating on a slope can interfere with the oil alert system and potentially starve the engine of lubrication.
- Don't Overfill Oil: Just as low oil is bad, overfilling can cause foaming, which reduces lubrication effectiveness, and can lead to excessive pressure in the crankcase, potentially causing seal damage.
- Periodic Check-ins: Even if stored, occasionally check on your generator. Look for signs of pests, leaks, or corrosion.
- Consider a Professional Check: If you're not comfortable performing certain maintenance tasks or if the generator develops a persistent issue, don't hesitate to take it to an authorized Honda service center.
Your Generator, Built to Last: Final Thoughts
Your Honda EU3000iS generator is a significant investment designed for reliability and performance. By embracing a proactive approach to Honda EU3000iS Maintenance & Long-Term Care, you're not just preventing problems; you're actively ensuring it lives up to its potential every time you need it.
From understanding the critical safety protocols to meticulously following the maintenance schedule for oil, air filters, and spark plugs, each step contributes to its overall health. Proper fuel management and thoughtful storage are equally vital for maintaining its pristine condition over years of use. Treat your generator right, and it will serve you faithfully, providing stable, clean power whenever and wherever you need it. It’s a powerful friend worth keeping in top shape.